Pan-Frying: A Chef’s Guide to Getting It Right Every Time
Pan-frying isn’t just “cooking in a pan.” It’s a precise technique that creates a crisp crust while keeping the inside juicy — and it’s the technique most home cooks get wrong.
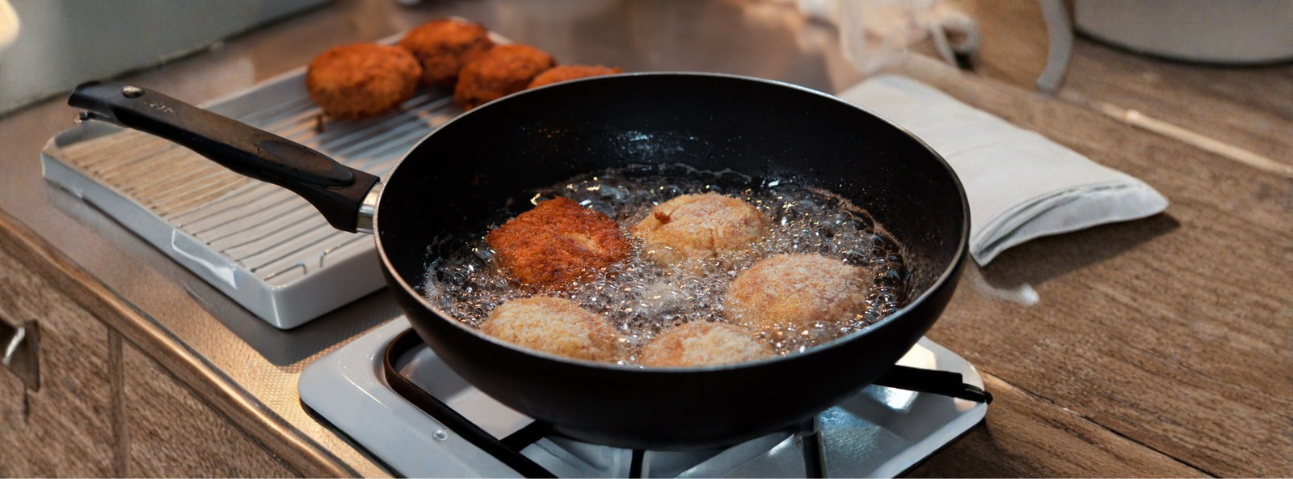
Pan-frying is one of the oldest cooking techniques in the world. Long before ovens, grills, or sous vide machines, people were cooking food in a pan over a fire. The method was born out of necessity — a simple pan, some heat, and a little oil could transform almost any ingredient into something delicious.
That hasn’t changed. Pan-frying is still one of the most useful techniques in any kitchen, professional or home. But somewhere along the way, it became misunderstood. Home cooks think pan-frying is just “cooking in a pan with oil.” It’s not.
Pan-frying has specific rules:
The oil has to be at the right temperature
The food has to be dry before it hits the pan
The pan has to be hot enough to create a crust
You have to leave the food alone long enough for that crust to form
I’ve spent years working in professional kitchens, and pan-frying was part of the daily rhythm. We pan-fried fish fillets, chicken cutlets, pork chops, schnitzel, crab cakes, and hundreds of other dishes. It’s one of the most versatile techniques we had — but only when done correctly.
This guide explains how pan-frying actually works, how professional kitchens do it, and the mistakes I’ve seen home cooks make over and over.
Table of Contents
ToggleQuick Reference (Chef's Cheat Sheet)
| What | Details |
|---|---|
| What it is | Cooking food in a moderate layer of oil in a hot pan |
| Best pans | Cast iron, stainless steel, carbon steel, non-stick (for delicate items) |
| Oil depth | 1/8 to 1/4 inch — enough to coat the pan, not deep-fry |
| Oil temperature | 325–375°F (163–190°C) depending on the food |
| Best oils | Neutral, high-smoke-point: canola, vegetable, grapeseed, peanut |
| Oils to avoid | Extra virgin olive oil (low smoke point), butter (burns) |
| Food prep | Dry surface, seasoned, sometimes breaded or floured |
| Time per side | 2–5 minutes depending on thickness |
| Signs of good pan-fry | Golden-brown crust, food releases from pan easily |
| When to flip | Once — when the crust is set and food releases on its own |
| After cooking | Drain on a rack (not paper towels) to keep crust crispy |
What Pan-Frying Actually Does
Pan-frying is the process of cooking food in a moderate amount of oil in a pan, over medium to medium-high heat.
Three things happen during a proper pan-fry:
1. The Maillard reaction.
When food hits a hot pan, the surface temperature rises above 300°F (150°C), triggering the Maillard reaction — the same browning that happens in searing. This creates the golden crust and deep flavor that define pan-fried food.
2. The crust forms.
Whether you’re pan-frying a plain chicken breast, a breaded cutlet, or a crab cake, the surface dehydrates and crisps up. This crust protects the interior from drying out while adding texture and flavor.
3. The interior cooks gently.
Unlike searing (which uses very high heat for a short time), pan-frying uses moderate heat. The food cooks through while the crust develops. This is why pan-frying works for thicker items — cutlets, fillets, patties — that need to cook all the way through.
What pan-frying does NOT do:
Pan-frying isn’t deep-frying. Deep-frying uses enough oil to fully submerge the food. Pan-frying uses a shallow layer of oil — enough to create a crust, not to float the food. If the oil is more than 1/2 inch deep, you’re deep-frying, not pan-frying.
The Professional Way vs. The Home Cook Way
| Step | Home Cook | Professional |
|---|---|---|
| Oil amount | Guessed | 1/8 to 1/4 inch, measured |
| Oil temperature | Judged by sight | Verified with thermometer |
| Food prep | Sometimes wet | Always pat dry, seasoned |
| Breading | Pressed on hastily | Dredged in flour, egg, crumbs — resting before frying |
| Pan preheat | Rushed | Preheated fully before oil goes in |
| Flipping | Multiple flips | One flip |
| Crowding | Fills the pan | Cooks in batches |
| Draining | Paper towels | Wire rack |
| Timing | Guessed | Timed per side, tested with thermometer |
Step-by-Step (From My Experience)
Step 1: Choose the Right Pan
You need a pan that holds heat evenly and has a flat bottom. Options:
Cast iron — best heat retention, but heavy
Stainless steel — good heat distribution, needs more oil
Carbon steel — the professional’s choice, light and responsive
Non-stick — good for delicate items (fish, eggs), but not for high heat
Chef’s note: In professional kitchens, we used carbon steel for most pan-frying because it heats fast, holds heat well, and develops a natural non-stick surface over time.
Step 2: Prep the Food Properly
This is where most home cooks go wrong. The food must be dry.
Pat the food completely dry with paper towels. Any surface moisture will steam instead of fry, preventing the crust from forming.
Season the food generously with salt and pepper. If you’re breading (flour, egg, breadcrumbs), do it just before frying — not ahead of time.
Chef’s note: For breaded items, let them rest for 5 minutes after breading. This helps the coating adhere and prevents it from falling off in the pan.
Step 3: Preheat the Pan
Place the pan over medium to medium-high heat and let it heat up for 2–3 minutes.
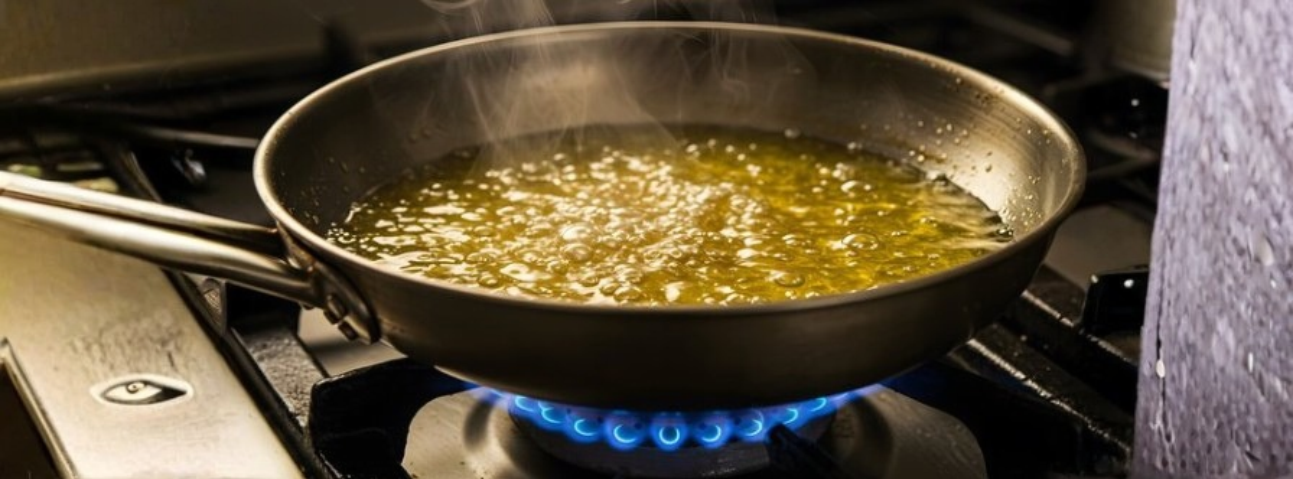
Chef’s note: A common mistake is adding oil to a cold pan. For pan-frying, heat the pan first, then add oil. The oil should shimmer when it hits the pan — that’s your signal that the temperature is right.
Step 4: Add the Oil
Add enough oil to coat the bottom of the pan to a depth of 1/8 to 1/4 inch. This is more oil than most home cooks use — but it’s what separates pan-frying from sautéing.
Chef’s note: Choose a neutral, high-smoke-point oil. Canola, vegetable, grapeseed, and peanut oil all work well. Olive oil (especially extra virgin) has a lower smoke point and burns too quickly.
Step 5: Test the Oil Temperature
Drop a small piece of bread or a pinch of flour into the oil. If it sizzles immediately and starts to brown in 30 seconds, the oil is ready (around 350°F).
Chef’s note: If you have an instant-read thermometer, use it. The oil should be 325–375°F depending on what you’re frying. Delicate items (fish, crab cakes) fry at the lower end. Heartier items (chicken cutlets, pork chops) fry at the higher end.
Step 6: Place the Food Carefully
Lay the food away from you in the pan — this prevents oil from splashing onto your hands.
Chef’s note: Don’t overcrowd the pan. If you crowd it, the temperature drops, and the food steams instead of frying. Cook in batches if needed.
Step 7: Leave It Alone
Once the food is in the pan, don’t move it. Don’t press it. Don’t poke it. Don’t flip it. Let the crust form.
How long? Depends on the thickness:
Thin cutlets: 1.5–2 minutes per side
Standard chicken breast: 4–5 minutes per side
Fish fillets: 3–4 minutes per side
Pork chops: 4–5 minutes per side
Crab cakes: 3–4 minutes per side
Chef’s note: The food will release from the pan on its own when it’s ready to flip. If it sticks, it’s not ready. Wait 30 more seconds.
Step 8: Flip Once
Flip the food once and cook the second side for the same amount of time.
Chef’s note: One flip. That’s it. Flipping back and forth prevents the crust from forming properly.
Step 9: Drain on a Rack
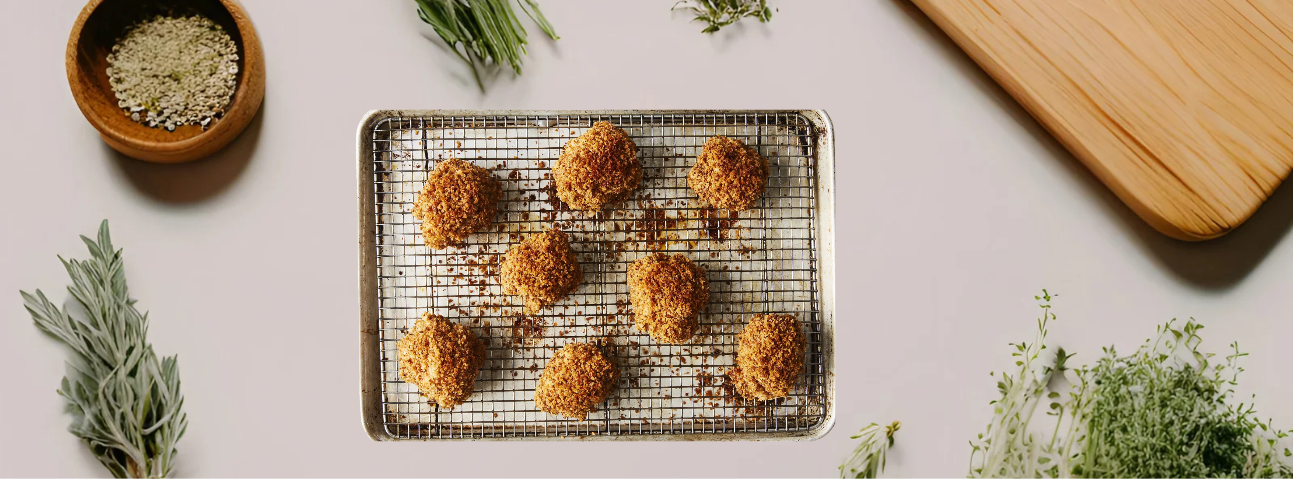
When the food is done, transfer it to a wire rack — not paper towels.
Chef’s note: Paper towels trap steam, which softens the crust. A wire rack lets air circulate underneath so the crust stays crispy.
Step 10: Serve Immediately
Pan-fried food is best served hot and fresh. If you need to hold it, keep it in a warm oven (200°F) on a rack — but not for more than 10 minutes.
The Mistakes I've Seen Most
These are the mistakes I’ve seen most often — in professional kitchens (from new cooks) and in home kitchens.
1. Wet food. The most common mistake. Any surface moisture steams instead of frying. Pat everything dry.
2. Not enough oil. Home cooks use a thin film of oil instead of 1/8 to 1/4 inch. This causes uneven cooking and sticking.
3. Oil not hot enough. If the oil isn’t shimmering when the food goes in, the crust won’t form.
4. Overcrowding the pan. Too much food at once drops the temperature and steams the food.
5. Flipping too often. Every flip interrupts crust formation. Flip once.
6. Pressing the food down. Pressing squeezes out juices and prevents the crust from forming. Leave it alone.
7. Draining on paper towels. This traps steam and softens the crust. Use a wire rack.
8. Not resting breaded items. If you bread and fry immediately, the coating falls off. Let it rest 5 minutes.
9. Wrong oil. Butter and extra virgin olive oil burn at pan-frying temperatures. Use neutral, high-smoke-point oils.
Temperature and Timing Guide
| Food | Oil Temp | Time per Side | Internal Temp | Notes |
| Chicken breast (1 inch) | 350°F | 4–5 min | 165°F | Rest 5 min |
| Chicken cutlet (1/4 inch) | 350°F | 1.5–2 min | 165°F | Breaded works well |
| Pork chop (1 inch) | 350°F | 4–5 min | 145°F | Rest 5 min |
| Salmon fillet | 325°F | 3–4 min (skin side first) | 125°F | Skin crisps |
| White fish (cod, halibut) | 325°F | 3–4 min | 130°F | Delicate |
| Shrimp | 350°F | 1.5–2 min | 120°F | Cook fast |
| Crab cakes | 325°F | 3–4 min | 145°F | Handle gently |
| Burger patty | 350°F | 3–4 min | 130–135°F | Don't press |
| Schnitzel | 350°F | 2–3 min | 165°F | Breaded |
| Latkes / hash browns | 350°F | 3–4 min | N/A | Press once, then leave |
Troubleshooting (What to Do When It Goes Wrong)
Problem: The food isn’t browning.
Cause: Oil not hot enough, or food was wet.
Fix: Increase heat and dry the food completely before frying.
Problem: The food is burning outside but raw inside.
Cause: Oil too hot, or food too thick.
Fix: Lower heat, cook longer, or finish in the oven.
Problem: The breading is falling off.
Cause: Food wasn’t dried, breading wasn’t pressed on, or food was fried immediately after breading.
Fix: Pat dry, press breading firmly, rest 5 minutes before frying.
Problem: The food is sticking to the pan.
Cause: Pan not hot enough, or not enough oil.
Fix: Wait for the food to release on its own — it will when it’s ready.
Problem: The oil is smoking.
Cause: Oil is too hot, or using the wrong oil.
Fix: Reduce heat and use a higher-smoke-point oil.
Problem: The crust is soggy.
Cause: Drained on paper towels, or food wasn’t cooked hot enough.
Fix: Use a wire rack and make sure the oil is at the right temperature.
Problem: The food is greasy.
Cause: Oil wasn’t hot enough when the food went in — it absorbed oil instead of frying.
Fix: Make sure the oil is shimmering before adding food.
What to Serve With Pan-Fried Dishes
Pan-fried proteins pair well with:
Mashed potatoes — classic pairing
Pan sauce — made from the fond in the pan (add wine, stock, butter)
Salad — for contrast
Roasted vegetables — for a complete meal
Rice or grains — for a lighter option
Crusty bread — to soak up the pan sauce
Pan-fried vegetables pair well with:
Lemon juice or vinegar (for brightness)
Fresh herbs (parsley, thyme, rosemary)
Grated Parmesan or aioli
Frequently Asked Questions
1. What's the difference between pan-frying and sautéing?
Sautéing uses less oil and higher heat, with food moved constantly. Pan-frying uses more oil, lower heat, and food stays still to form a crust.
2. How much oil do I use for pan-frying?
1/8 to 1/4 inch deep. Enough to crust the food, not submerge it.
3. What's the best oil for pan-frying?
Neutral, high-smoke-point oils: canola, vegetable, grapeseed, peanut.
4. Can I pan-fry with butter?
No — butter burns at pan-frying temperatures. If you want butter flavor, add it at the end.
5. Do I need a thermometer?
Not required, but helpful. The oil should shimmer when it’s ready.
6. How do I know when to flip?
When the food releases from the pan on its own. If it sticks, it’s not ready.
7. Should I press the food down with a spatula?
No. Pressing squeezes out juices and prevents proper crust formation.
8. How do I prevent breading from falling off?
Pat the food dry, press the breading firmly, and let it rest 5 minutes before frying.
9. Can I pan-fry frozen food?
No. Thaw completely and pat dry.
10. How do I keep the crust crispy?
Drain on a wire rack (not paper towels) and serve immediately.
11. Why is my food greasy?
Oil wasn’t hot enough when the food went in. It absorbed oil instead of frying.
12. Can I reuse the oil?
Yes, if you filter it and store it properly. Don’t reuse oil that smells burnt or has food particles in it.
Final Thoughts
Pan-frying is a simple technique — but simple doesn’t mean easy. The rules are:
Dry the food
Heat the pan properly
Use enough oil
Wait for the right temperature
Leave the food alone
Flip once
Drain on a rack
Do those things, and pan-frying becomes one of the most reliable techniques in your kitchen.
In professional kitchens, pan-frying was a daily skill — because it’s fast, versatile, and reliable. It can turn a simple chicken breast into a golden-crusted cutlet, or a plain fish fillet into something that looks like it came from a restaurant.
Pan-frying isn’t cooking. It’s a technique that rewards attention and patience.
Disclaimer
This article is based on personal experience working in professional kitchens. Cooking techniques and results may vary based on your equipment, ingredients, and skill level. Photos are for illustrative purposes.

Pingback: Sauteing Tips 101 : Your Guide To Delicious Food | MasterChefTips.com
Pingback: Stir Frying : Mastering Quick And Flavorful Cooking