Blanching: The 60-Second Technique That Changes Vegetables
Blanching isn’t cooking — it’s pre-cooking. It’s the technique that keeps vegetables bright, crisp, and full of flavor before they hit the pan, the plate, or the freezer. Here’s how professional kitchens do it.
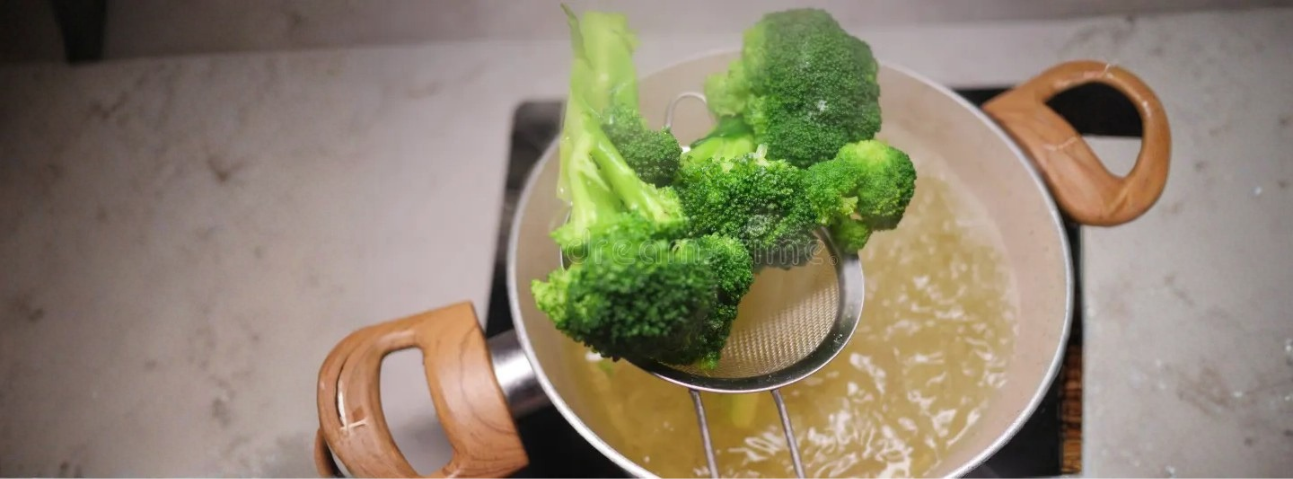
Blanching is the shortest cooking technique in the kitchen. Most vegetables are in the water for less than two minutes. Some are in for 30 seconds.
And yet, that brief dip in boiling water is the difference between vegetables that look alive and vegetables that look tired. It’s the technique that keeps broccoli bright green, green beans snappy, and asparagus vibrant — before they get finished in a pan, tossed in a salad, or frozen for later.
I’ve spent years working in professional kitchens, and blanching was part of the daily rhythm. We blanched green beans for service, broccoli for stir-fries, asparagus for salads, potatoes for roasting. It’s the technique that made the rest of the cooking easier — and it’s the technique most home cooks skip.
This guide explains how blanching actually works, when to use it, and the mistakes I’ve seen home cooks make over and over.
The Blanching Cheat Sheet
| What | Details |
|---|---|
| What it is | Briefly cooking vegetables in boiling water, then shocking them in ice water |
| Water temperature | 212°F (100°C) — a rolling boil |
| Ice bath temperature | 32–40°F (0–4°C) — as cold as possible |
| Salt ratio | 1–2 tablespoons per gallon of water |
| Time | 30 seconds (leafy greens) to 4 minutes (root vegetables) |
| Best for | Green vegetables, root vegetables, potatoes, tomatoes |
| Not ideal for | Mushrooms, onions, delicate herbs |
| Signs it's right | Bright color, tender-crisp texture |
| Signs it's wrong | Dull color, mushy texture, waterlogged |
| Why it works | Sets color, stops enzyme activity, preps for freezing |
What Blanching Actually Does
Blanching is the process of briefly cooking food in boiling water, then immediately transferring it to ice water to stop the cooking.
Three things happen during a proper blanch:
1. Enzymes are deactivated.
Vegetables contain enzymes that cause them to lose color, flavor, and nutrients over time — even after they’re picked. Blanching deactivates these enzymes, which is why blanched vegetables stay bright and fresh for longer than raw ones.
2. Color is set.
The brief exposure to boiling water sets the chlorophyll in green vegetables, making them stay bright green instead of turning dull or olive-colored.
3. Texture is preserved.
Blanching partially cooks the vegetables but keeps them tender-crisp. This is what makes them ready for finishing — sautéing, grilling, or serving cold in a salad — without turning to mush.
What blanching is NOT:
Blanching isn’t boiling. Boiling cooks food all the way through — pasta, potatoes, eggs. Blanching partially cooks food for a specific purpose. The vegetable comes out crisp, not soft.
Blanching isn’t steaming either. Steaming cooks food in vapor — the food never touches the water. Blanching submerges food briefly in boiling water, then shocks it in ice water. Both preserve nutrients, but they’re different techniques.
The Professional Way vs. The Home Cook Way
| Step | Home Cook | Professional |
|---|---|---|
| Water volume | Just enough to cover | Generous — enough for vegetables to move freely |
| Salt | Sometimes skipped | 1–2 tablespoons per gallon |
| Ice bath | Sometimes skipped | Always prepared before blanching starts |
| Timing | Guessed | Timed precisely |
| Batch size | Everything at once | Small batches — a few cups at a time |
| Shocking | Sometimes skipped | Immediate — as soon as blanching stops |
| Draining | Shakes colander | Spreads on a towel to dry |
| Use | Served immediately | Finished in a pan, salad, or frozen |
How I Blanch: 10 Steps, Start to Finish
Step 1: Prepare the Ice Bath First
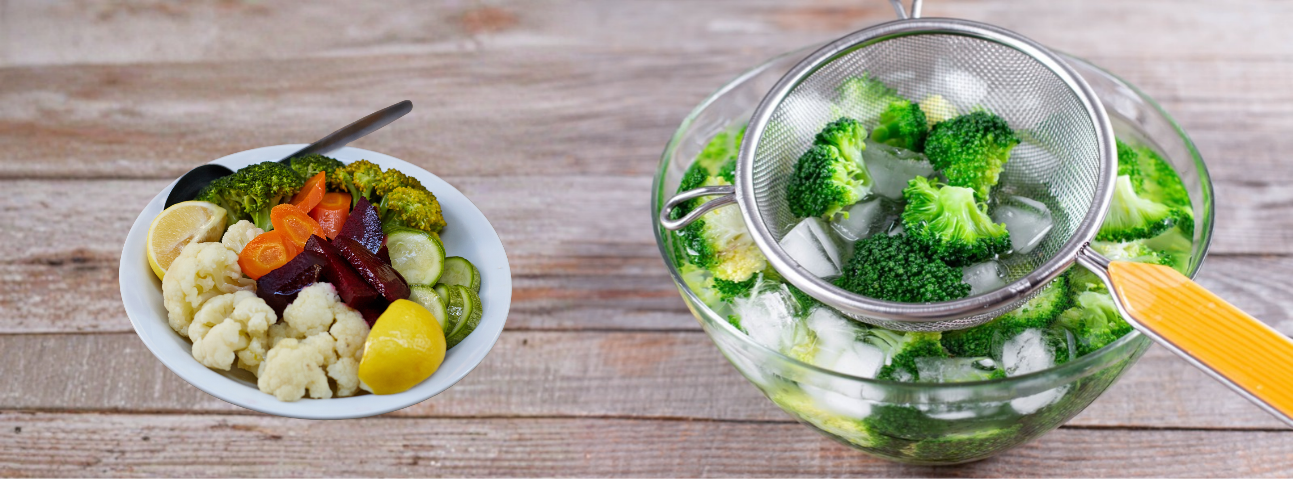
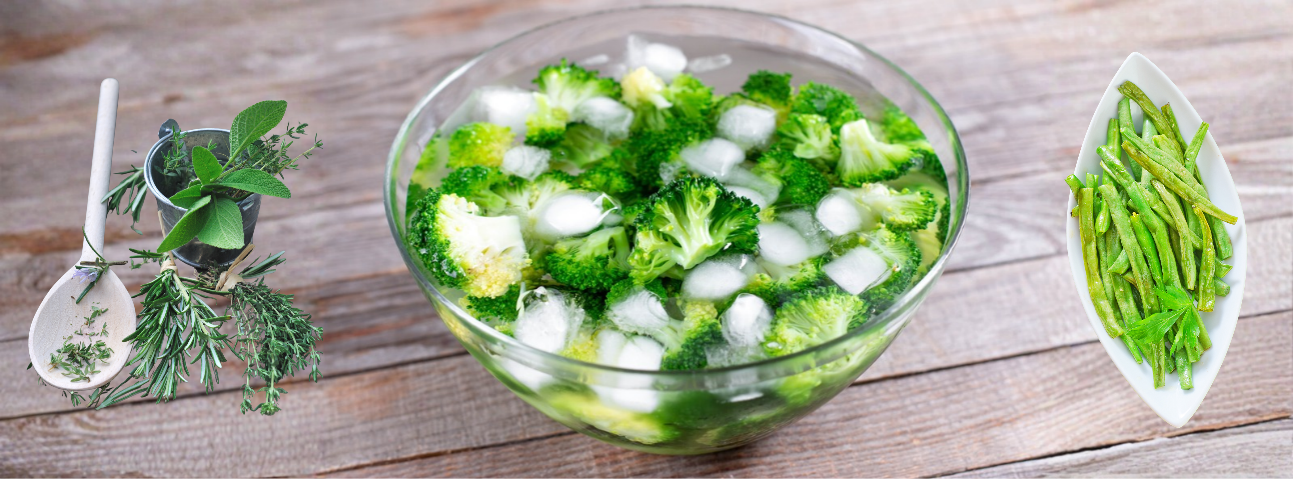
Fill a large bowl with cold water and ice. Set it next to the stove.
Chef’s note: In professional kitchens, the ice bath is ready before the water boils. If the ice bath isn’t ready when the vegetables come out of the boiling water, the vegetables keep cooking — and turn mushy. This is the most common mistake I’ve seen.
Step 2: Bring a Large Pot of Water to a Rolling Boil
Use 4–6 quarts of water. The more water, the more the temperature stays up when you add vegetables.
Chef’s note: If your pot is too small, the water temperature drops when you add the vegetables — and they don’t blanch properly. Use a large pot.
Step 3: Salt the Water Generously
Add 1–2 tablespoons of salt per gallon of water.
Chef’s note: Salt doesn’t just flavor — it helps the vegetables retain their color and structure. Unsalted blanching water produces bland, less-bright vegetables.
Step 4: Cut Vegetables Into Uniform Pieces
Cut vegetables into even pieces so they blanch at the same rate.
- Broccoli: Cut into florets, similar sizes
- Green beans: Trim ends, leave whole
- Asparagus: Trim woody ends, leave whole
- Carrots: Peel and cut into sticks or coins
- Potatoes: Cut into wedges or cubes
Chef’s note: Uniform pieces = uniform results. If the pieces are different sizes, some will be overcooked while others are still raw.
Step 5: Add Vegetables in Small Batches
Add 2–3 cups at a time — not the whole pile.
Chef’s note: Overcrowding drops the water temperature. When you add too much at once, the water stops boiling and the vegetables steam instead of blanch. Add in batches if needed.
Step 6: Blanch for the Right Time
Timing depends on the vegetable:
- Leafy greens (spinach, kale): 30 seconds
- Green beans, snow peas: 1–2 minutes
- Broccoli, asparagus, cauliflower: 2–3 minutes
- Carrots, green peas: 2–3 minutes
- Potatoes (cubed): 3–4 minutes
Chef’s note: Set a timer. Blanching goes fast, and 30 seconds too long turns crisp vegetables into soft ones.
Step 7: Remove Immediately
Use a slotted spoon, spider strainer, or tongs to remove the vegetables from the boiling water. Transfer directly to the ice bath.
Chef’s note: Don’t drain into a colander first. The vegetables need to go straight from boiling water to ice water. Any delay is more cooking time.
Step 8: Shock in Ice Water
Submerge the vegetables in the ice bath for the same amount of time they were blanched — usually 1–3 minutes.
Chef’s note: The ice bath stops the cooking instantly. If you skip this step, the vegetables keep cooking from their own internal heat — and turn mushy.
Step 9: Drain and Dry
Transfer the vegetables to a colander. Drain well. If you’re going to freeze them, spread them on a towel and pat dry.
Chef’s note: Dry vegetables freeze better and sauté better. Moisture causes ice crystals in the freezer and steaming in the pan.
Step 10: Use Immediately or Store
Blanched vegetables can be:
- Finished in a pan — sautéed with garlic, oil, or butter
- Served cold in a salad — with vinaigrette, herbs, or cheese
- Frozen for later use — spread on a tray, freeze, then transfer to bags
- Added to pasta dishes — tossed in the last minute of cooking
- Added to stir-fries — added at the end for a quick finish
Chef’s note: In professional kitchens, we blanched vegetables in the morning, stored them in the fridge, and finished them to order during service. This is how restaurants serve perfectly cooked vegetables at high speed.
The Blanching Mistakes I’ve Watched Home Cooks Make
1. Not preparing the ice bath first. The vegetables keep cooking if the ice bath isn’t ready.
2. Not enough salt in the water. Salt preserves color and flavor. Use 1–2 tablespoons per gallon.
3. Overcrowding the pot. Too many vegetables = temperature drops = uneven blanching.
4. Not cutting vegetables into uniform pieces. Different sizes blanch at different rates.
5. Blanching for too long. Most vegetables need 1–3 minutes. Leafy greens need 30 seconds.
6. Not using enough ice. A few ice cubes in warm water isn’t an ice bath. Use plenty of ice.
7. Not draining and drying well. Wet vegetables steam instead of sauté. Dry them before finishing.
8. Skipping the blanch for freezing. Frozen vegetables need blanching to preserve color and texture. Without it, they turn mushy and dull.
9. Reusing the boiling water too many times. The water becomes starchy and cloudy. Change it between batches of different vegetables.
10. Forgetting to shock the vegetables. Skipping the ice bath is the #1 mistake. It’s the step that makes blanching work.
Blanching Times by Vegetable
| Vegetable | Time | Notes |
|---|---|---|
| Spinach, kale | 30 sec | Until just wilted |
| Basil, parsley | 15–20 sec | For herb purées |
| Snow peas, snap peas | 1 min | Bright green |
| Green beans | 1–2 min | Tender-crisp |
| Asparagus (thin) | 1–2 min | Bright green |
| Asparagus (thick) | 2–3 min | Tender-crisp |
| Broccoli florets | 2–3 min | Bright green |
| Cauliflower florets | 2–3 min | Tender-crisp |
| Green peas | 1–2 min | Bright green |
| Carrots (sliced) | 2–3 min | Tender |
| Carrots (whole baby) | 3–5 min | Tender |
| Corn on the cob | 3–5 min | Then cool and cut |
| Potatoes (cubed) | 3–4 min | For roasting or frying |
| Brussels sprouts | 3–4 min | Trimmed and halved |
| Tomatoes | 15–30 sec | For peeling |
When Blanching Goes Wrong
Problem: The vegetables are mushy.
Cause: Blanched too long, or ice bath wasn’t ready.
Fix: Shorten blanching time. Have the ice bath prepared before the vegetables go in.
Problem: The vegetables are dull, not bright.
Cause: Not enough salt in the water, or blanched too long.
Fix: Salt the water generously. Shorten the blanching time.
Problem: The vegetables lost their color.
Cause: Overcooked, or not shocked properly.
Fix: Shorten time and shock in ice water immediately.
Problem: The vegetables are unevenly cooked.
Cause: Pieces weren’t uniform, or too many added at once.
Fix: Cut uniformly. Blanch in small batches.
Problem: The vegetables taste bland.
Cause: Not enough salt in the water.
Fix: Use 1–2 tablespoons per gallon. Salt before adding vegetables.
Problem: The vegetables are waterlogged after blanching.
Cause: Not drained or dried well.
Fix: Drain in a colander, then spread on a towel and pat dry.
Problem: Frozen vegetables are mushy after thawing.
Cause: Not blanched before freezing, or blanched too long.
Fix: Always blanch before freezing. Keep the blanching time short.
Problem: The blanching water became cloudy and starchy.
Cause: Reused water, or too many vegetables.
Fix: Change the water between batches. Use fresh water for each type of vegetable.
What to Serve With Blanched Vegetables
Blanched vegetables are the base for countless dishes:
- Salads — toss with vinaigrette, herbs, cheese
- Stir-fries — add at the end for a quick finish
- Pasta dishes — toss with pasta, olive oil, garlic
- Grain bowls — with rice, quinoa, protein
- Roasted vegetable plates — finish in the oven
- Dips — serve with hummus, tzatziki, or aioli
- Freezer meals — freeze for later use
Frequently Asked Questions
1. What’s the difference between blanching and boiling?
Blanching is a brief cook in boiling water, followed by an ice bath. Boiling fully cooks food. Blanching partially cooks it.
2. Do I have to use an ice bath?
Yes. The ice bath stops the cooking instantly. Without it, the vegetables keep cooking and turn mushy.
3. How long should I blanch vegetables?
30 seconds for leafy greens, 1–2 minutes for green beans and peas, 2–3 minutes for broccoli and carrots, 3–4 minutes for potatoes.
4. Can I blanch without ice?
Cold running water works in a pinch, but ice is better. The colder the water, the faster the cooking stops.
5. Why do I need to salt the water?
Salt preserves color, flavor, and texture. It’s not just for seasoning.
6. Can I reuse the blanching water?
Only for the same type of vegetable. Different vegetables leave flavors in the water.
7. Should I blanch before freezing vegetables?
Yes. Blanching deactivates enzymes that cause color and flavor loss during freezing.
8. Can I blanch in the microwave?
Yes — with a microwave-safe bowl and a small amount of water. Times vary.
9. Do I need to dry the vegetables after blanching?
Yes, especially if you’re going to sauté or freeze them. Dry vegetables sauté better and freeze better.
10. Can I blanch tomatoes?
Yes. 15–30 seconds in boiling water, then ice bath. The skin slips off easily.
11. What vegetables shouldn’t be blanched?
Mushrooms, onions, and delicate herbs (like basil) don’t blanch well.
12. Can I blanch vegetables for a stir-fry?
Yes. Blanching pre-cooks the vegetables so they finish fast in the wok.
13. What’s the difference between blanching and parboiling?
They’re essentially the same technique. Parboiling is a slightly longer blanch (3–5 minutes) used for foods that need more cooking (like potatoes for roasting).
14. Can I blanch with salted water for pasta?
No. The salt ratios are different. Pasta water is salted for flavor; blanching water is salted for color and texture.
15. How do I store blanched vegetables?
Refrigerate for 3–5 days. Freeze for 6–12 months.
Blanching is a brief cook in boiling water, followed by an ice bath. Boiling fully cooks food. Blanching partially cooks it.
Yes. The ice bath stops the cooking instantly. Without it, the vegetables keep cooking and turn mushy.
30 seconds for leafy greens, 1–2 minutes for green beans and peas, 2–3 minutes for broccoli and carrots, 3–4 minutes for potatoes.
Cold running water works in a pinch, but ice is better. The colder the water, the faster the cooking stops.
Salt preserves color, flavor, and texture. It’s not just for seasoning.
Only for the same type of vegetable. Different vegetables leave flavors in the water.
Yes. Blanching deactivates enzymes that cause color and flavor loss during freezing.
Yes — with a microwave-safe bowl and a small amount of water. Times vary.
Yes, especially if you’re going to sauté or freeze them. Dry vegetables sauté better and freeze better.
Yes. 15–30 seconds in boiling water, then ice bath. The skin slips off easily.
Mushrooms, onions, and delicate herbs (like basil) don’t blanch well.
Yes. Blanching pre-cooks the vegetables so they finish fast in the wok.
They’re essentially the same technique. Parboiling is a slightly longer blanch (3–5 minutes) used for foods that need more cooking (like potatoes for roasting).
No. The salt ratios are different. Pasta water is salted for flavor; blanching water is salted for color and texture.
Refrigerate for 3–5 days. Freeze for 6–12 months.
Final Thoughts
Blanching is the shortest technique in the kitchen, and the one that pays off the most. It’s 60 seconds of work that keeps vegetables bright, crisp, and ready for whatever comes next.
The rules are simple:
- Prepare the ice bath first
- Use enough water and salt
- Cut vegetables uniformly
- Blanch in small batches
- Time it precisely
- Shock in ice water immediately
- Drain and dry
Do those things, and blanching becomes one of the most useful techniques in your kitchen.
In professional kitchens, blanching was the technique that made service possible. Cooks could blanch vegetables in the morning and finish them to order in minutes. It wasn’t glamorous. But it was fast, consistent, and reliable.
Blanching isn’t cooking. It’s 60 seconds of precision — and the technique that makes everything else easier.
Disclaimer
This article is based on personal experience working in professional kitchens. Cooking techniques and results may vary based on your equipment, ingredients, and skill level. Photos are for illustrative purposes.